Vendor-specific DNS records
This article requires prior knowledge of DNS record management via the Cloudflare dashboard. To learn more, refer to Cloudflare’s article on managing DNS records.
Google Workspace requires specific MX records ↗ added to your DNS provider.
Once you add these records to Cloudflare:
- Test the configuration ↗
- Do not add other
MXrecords other than those provided by Google.
If you want to customize the service addresses URLs associated with Google Workspace, refer to Google’s documentation ↗.
To add a site verification record in Cloudflare, follow Google’s documentation ↗.
AWS customers must update their domain’s nameservers ↗ to point to their new Cloudflare nameservers.
Find the URL ↗ for your bucket.
Then, create a CNAME record in Cloudflare. For example, if the full host URL of the bucket is files.example.com.s3.amazonaws.com, you would add a CNAME record similar to the following:
files CNAME files.example.com.s3.amazonaws.comFor help setting up DKIM in SES, refer to the Amazon documentation ↗.
Refer to Amazon’s ELB help content ↗ for guidance on ELB configuration at Amazon, but generally you should:
Add a CNAME record to Cloudflare for the hostname you receive from AWS, for example:
| Type | Name | Target | Proxy status |
|---|---|---|---|
CNAME | elb | <AWS_HOSTNAME>.<REGION>._elb.amazonaws.com | Proxied |
For information about the records to Microsoft 365, refer to Microsoft’s documentation ↗.
Follow Microsoft’s instructions on configuring Azure DNS settings ↗.
Then, add Azure’s required records to Cloudflare DNS.
To use Discourse with Cloudflare, refer to Using Discourse with Cloudflare: Best Practices ↗.
To use Cloudflare with Forward Email, refer to Forward Email configuration with Cloudflare ↗.
You can configure Cloudflare to work with ClickFunnels. The process requires updating your Cloudflare DNS settings.
To use Cloudflare with Zoho, refer to Zoho configuration with Cloudflare ↗.
Refer to Unbounce’s documentation to get a CNAME value ↗, then add that record within Cloudflare.
Refer to SendGrid’s documentation for how to make SendGrid compatible with Cloudflare ↗.
For help configuring WPEngine sites, refer to:
For help with Ning, refer to Use a custom domain with Ning ↗.
For help with SmugMug, refer to Use a custom domain with SmugMug ↗.
For help with Mailchimp, refer to Use a custom domain with Mailchimp ↗.
Configure Rackspace CloudFiles via CNAME record. Consult the Rackspace documentation ↗.
Refer to Rackspace CloudFiles’s documentation to get a CNAME value ↗, then add that record within Cloudflare.
First, make sure you update your nameservers and your domain is active.
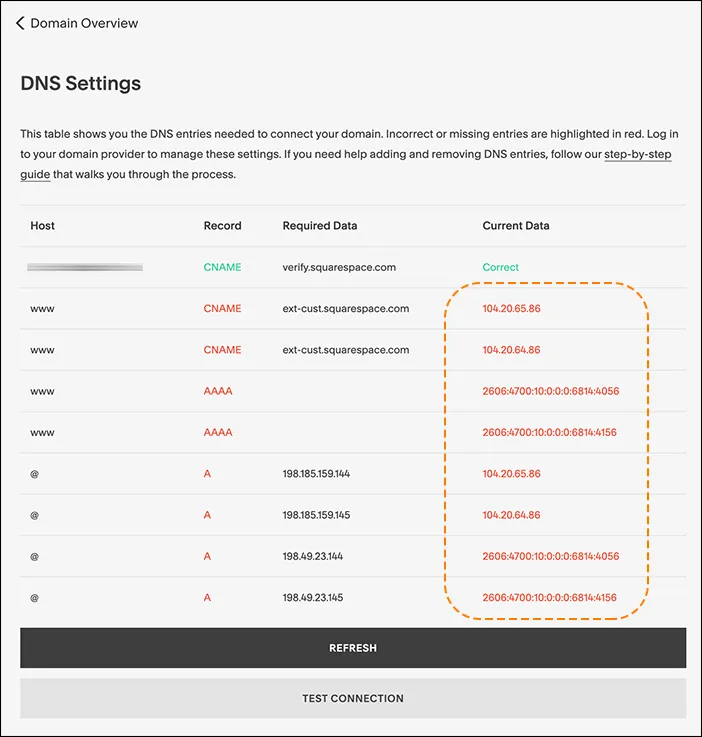
Then, set up your Squarespace DNS records:
- Get your Squarespace DNS information by following these instructions ↗.
- In Cloudflare, add those records:
- All
Arecords should be Proxied - The
CNAMErecord forwwwshould also be Proxied. - The
CNAMErecord forverify.squarespace.comshould be DNS-only.
- All
- If set up properly, your Squarespace DNS Settings page will now indicate that your ‘Settings contain problems.’ This is the expected behavior.

The CNAME record you added for verify.squarespace.com should be DNS-only.
If you proxy this record, Squarespace will not be able to verify your domain ownership and show you a This website is pending domain owner verification error. To fix the issue, edit the CNAME record and change the Proxy status to DNS-only.
Refer to Tumblr’s documentation to get DNS record values ↗. Then, add records to Cloudflare DNS.
You can use Cloudflare with Wix websites ↗, though your setup needs to be different than with most website builders.
This is because Wix does not support ↗ using Cloudflare nameservers (which is the normal part of a full setup or with domains bought through Cloudflare Registrar).
If you want to manage your DNS through Cloudflare or you bought a domain through Cloudflare Registrar, you can connect that domain to Wix through domain pointing ↗.
This method means your website is using Cloudflare for DNS only, so all your DNS records should be DNS-only (unproxied).